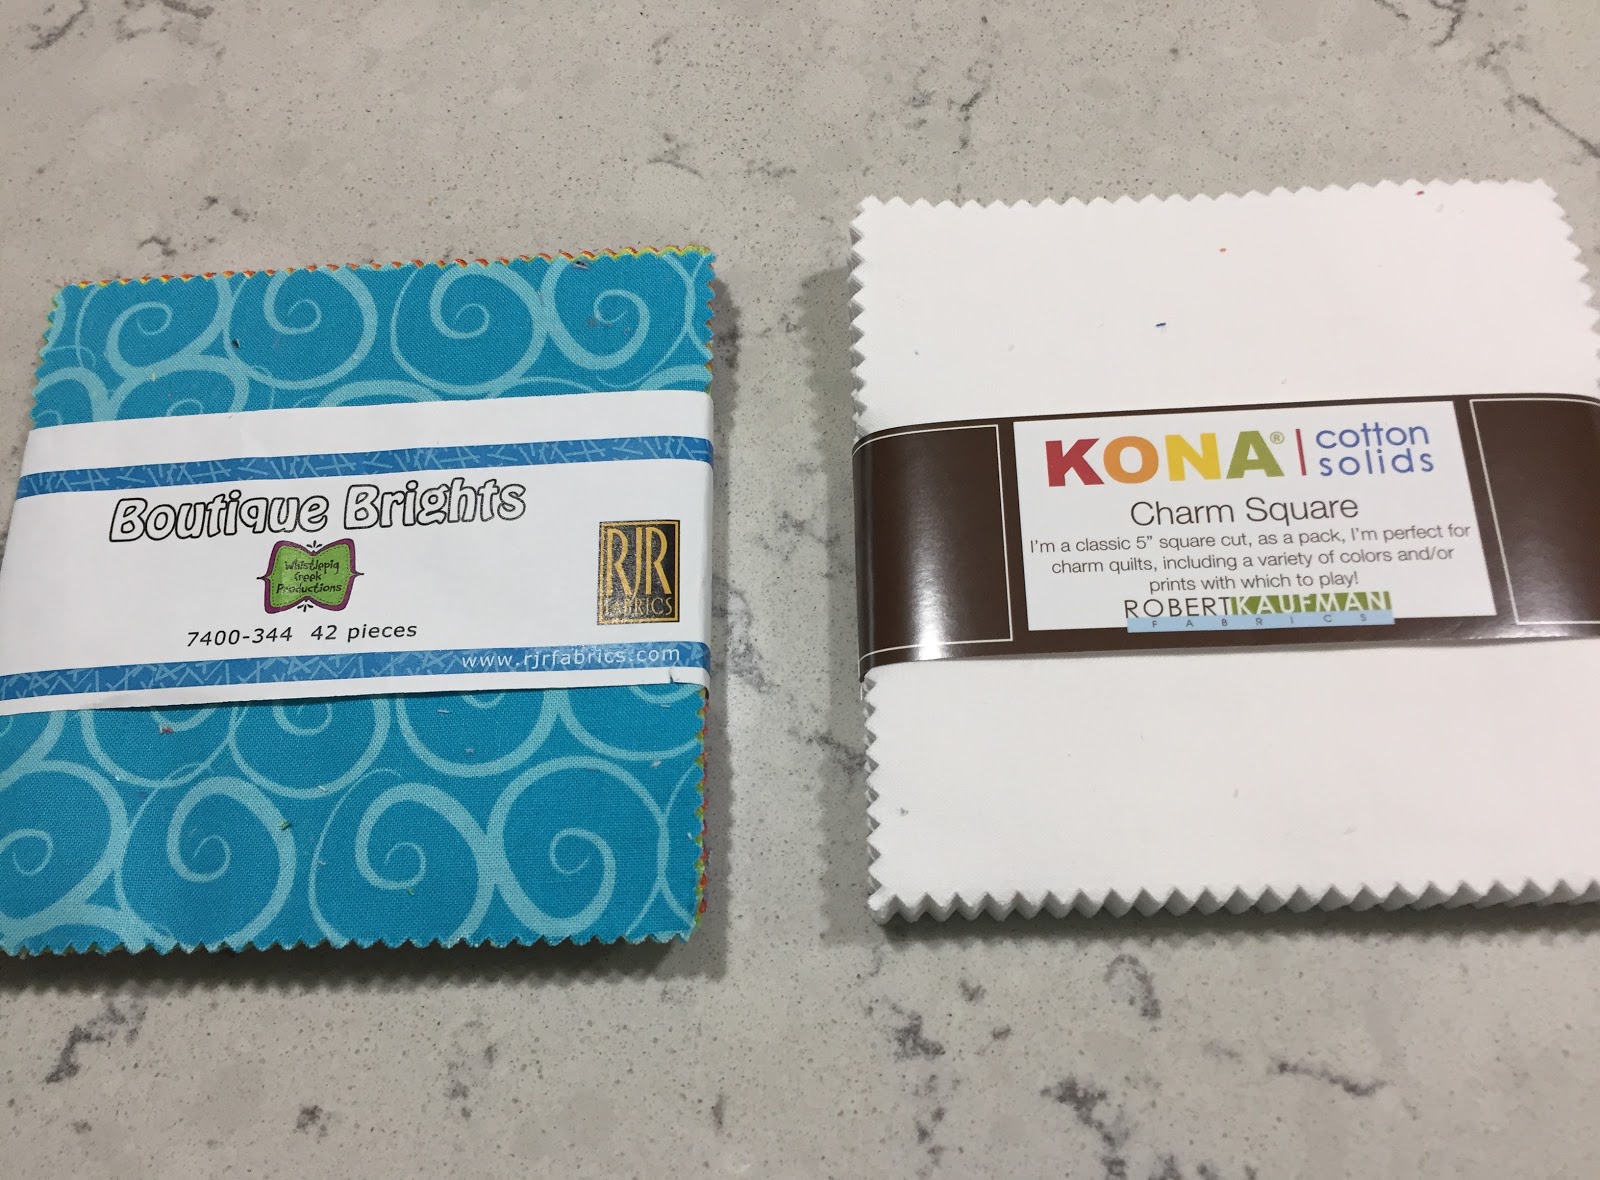
After I finished my Sew Together Bag, I was looking for a quick quilt project. So I pulled this fabric from the bin. They are charm packs Kona Cotton Solids in White and Boutique Brights from RJR.
I put them together in a simple pattern. I’m sure it has a name, but I don’t know it. Then put the binding on, my favorite strips from the stash.


At this point, I have not mastered machine sewing my binding. Once I have it attached, I am still learning how to sew in the ditch and catch the binding on the reverse side. I think I am getting better, but it will be awhile before I can say I’ve mastered. Oh well, that leave me lots of projects to practice.
Here is the finish, I used some leftovers for the backing. This is will go into the charity stash.


We had our first real Fall feeling day today. The temps were in the mid 60’s with a little breeze. The sun came out after some early morning rain.

But Cocoa, decided that a nice nap was in order, here she is bundled up.

Linking with
Work In Progress With Friends
Linky Tuesday
QuiltStory
Sew Fresh Quilts
Confessions of a Fabric Addict
Work In Progress With Friends
Midweek Makers
My Quilt Infatuation NTT
Finished or Not Friday
Your quilt is so cheerful and bright! You make it sound so easy! This quilt is one that would be so nice to snuggle under with it's joy and warmth! 🙂
I like your bold and colorful quilt! Simple piecing lets the colors and fabrics shine. For machine stitched binding, try glue basting. Attach the binding to the quilt front as usual, press it outward, and pin the corner miters securely. Working from the back, clip or pin the binding in place every 4" or so. Then using wash-out glue with a fine tip, glue it in place and press with the iron, removing the pins or clips as you go, but leaving the pins in at the mitered corners. SID from the front, and your stitching should catch the back of the binding about 1/16 to 1/8" in from the edge.
What a great quilt. I know someone will really love it. Another thought is to try two color binding that makes a perfect place to sew in the ditch. I think this one would be a great way to do binding. I haven't tried it yet but boy it calls to me! Plus there is a video also. It's called Suzie's Magic Binding.
Very pretty charity quilt. It will be loved. Blessings, Gretchen
What a lovely colourful quilt – I think I would quite like to make something that was a quick and simple project.
What a fun and cheery charity quilt!
Simple, but very nice! Thank you for sharing this on Midweek Makers
Such a bright quilt! Love it. thanks for linking up at Mama Spark's WIPs With Friends!
What a bright, happy quilt! I love a quick project.
I would call this pattern "Checkerboard," and it looks really great with the bright colors! Good job!
It's a fun quilt! I stitch the binding to the back of the quilt, turn it over and stitch it down from the front, all by machine. This way there's no wondering if all of the binding got stitched in. The difficulty here is making sure the first seam allowance is just right so there is enough to sew down on the front.